Deploy Nextcloud on your server
How to deploy nextcloud with docker compose and access it in https
Prerequisites
You will need to have a working docker environnement, fot that you can follow this post
Deploy Nextcloud with docker compose
Preparing the Docker Compose File
Create a Docker Compose file that defines the Nextcloud service and its dependencies. Open a text editor and create a new file named docker-compose.yml. Paste the following content into the file:
version: '3'
services:
  db:
    image: mariadb
    container_name: db
    command: --transaction-isolation=READ-COMMITTED --binlog-format=ROW
    restart: always
    volumes:
      - /PATH/LOCAL/STORAGE/nextcloud/db:/var/lib/mysql
    environment:
      - MYSQL_ROOT_PASSWORD=A_STRONG_PASSWORD
      - MYSQL_PASSWORD=ANOTHER_STRONG_PASSWORD
      - MYSQL_DATABASE=nextcloud
      - MYSQL_USER=nextcloud

  redis:
    image: redis:alpine
    container_name: redis
    restart: always

  nextcloud:
    image: nextcloud
    container_name: nextcloud
    ports:
      - 8080:80
    environment:
      - MYSQL_PASSWORD=SAME_THAN_MYSQL_PASSWORD_FOR_THE_DB
      - MYSQL_DATABASE=nextcloud
      - MYSQL_USER=nextcloud
      - MYSQL_HOST=db
      - REDIS_HOST=redis
    volumes:
      - /PATH/LOCAL/STORAGE/nextcloud/www:/var/www/html
    restart: always
Make sure to replace A_STRONG_PASSWORD and ANOTHER_STRONG_PASSWORD with secure passwords of your choice and also /PATH/LOCAL/STORAGE to a folder to store your nextcloud datas.
Save the file once you've made the necessary changes.
Running Nextcloud with Docker Compose
Now that we have our Docker Compose file ready, let's proceed with running Nextcloud:
Run the following command to start the Nextcloud service:
docker-compose up -d
Once every container started you can access your nextcloud instance with http://your_server_ip:8080
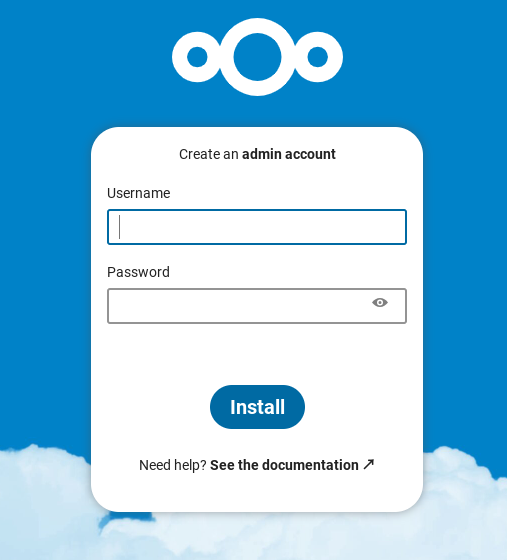
You just need to the create the user login and password , click Install and you are good to go.
Configure Nextcloud to use HTTPS
Configure Traefik
To access Nextcloud using https the best way is o to use a reverse proxy, like usual we will use traefik as the reverse proxy, if you don't have traefik installed you can see how to do it here
https://2nistech.world/traefik-an-easy-reverse-proxy/
Now you have traefik up and running, you can add the followings labels to your docker compose file for Seafile.
    labels:
      - traefik.enable=true
      - traefik.http.routers.nextcloud.rule=Host(`nextcloud.your.domain`)
      - traefik.http.routers.nextcloud.entrypoints=websecure
      - traefik.http.routers.nextcloud.tls.certresolver=myresolver
      - traefik.http.routers.nextcloud.middlewares=nextcloud-headers,nextcloud-dav
      - traefik.http.middlewares.nextcloud-headers.headers.stsSeconds=15552000
      - traefik.http.middlewares.nextcloud-headers.headers.stsIncludeSubdomains=true
      - traefik.http.middlewares.nextcloud-headers.headers.stsPreload=true
      - traefik.http.middlewares.nextcloud-headers.headers.forceSTSHeader=true
      - traefik.http.middlewares.nextcloud-dav.redirectregex.regex=https://(.*)/.well-known/(card|cal)dav
      - traefik.http.middlewares.nextcloud-dav.redirectregex.replacement=https://$$1/remote.php/dav/
      - traefik.http.middlewares.nextcloud-dav.redirectregex.permanent=true
Configure NextCloud
There is 2 way to configure SSL with nextcloud once the reverse proxy is configured
On an already running nextcloud server
Edit the file /PATH/LOCAL/STORAGE/nextcloud/www/config/config.php and add the followings lines before the last )
  'overwriteprotocol' => 'https',
  'trusted_proxies' =>
  array (
    0 => '172.19.0.0/16',
  ),
where '172.19.0.0/16' is the subnet of your docker network
and also add your domain name as trused_domain in the same file
  'trusted_domains' =>
  array (
    0 => '192.168.1.50:8080', # This line may look different on your setup, don't modify it.
    1 => 'nextcloud.yoc.local',
  ),
Once it's done, save the file and restart your nextcloud container with docker compose restart nextcloud
You can now access your nextcloud server using https://nextcloud.your.domain
On a new docker deployement
You can directly deploy Nextcloud with SSL by adding the 3 followings lines in your docker-compose.yml file
      - NEXTCLOUD_TRUSTED_DOMAINS=nextcloud.your.domain
      - TRUSTED_PROXIES=172.19.0.0/16 # Subnet of your docker network CIDR format
- OVERWRITEPROTOCOL=https/PATH/LOCAL/STORAGE/nextcloud/www/config/config.php if you want to modify / update it.Final configuration
At the end on a new Nextcloud deployement with Nextcloud and Traefik, your , your docker-compose.ymlfile should looks like this.
version: '3'
services:
  traefik:
    container_name: traefik
    image: traefik:v2.10
    command:
      - --api.insecure=true
      - --providers.docker
      - --providers.docker.exposedbydefault=false
      - --entryPoints.websecure.address=:443
      - --entrypoints.websecure.http.tls=true
      - --certificatesresolvers.myresolver.acme.dnschallenge=true
      - --certificatesresolvers.myresolver.acme.dnschallenge.provider=cloudflare
      - --certificatesresolvers.myresolver.acme.email=YOUR_EMAIL_ADDRESS
      - --certificatesresolvers.myresolver.acme.storage=/letsencrypt/acme.json
    environment:
      - CF_DNS_API_TOKEN=YOUR_CLOUDFLARE_API_KEY
    ports:
      - 443:443
      - 8080:8080
    volumes:
      - /var/run/docker.sock:/var/run/docker.sock
      - /PATH/LOCAL/STORAGE/traefik/letsencrypt:/letsencrypt
    restart: always

  db:
    image: mariadb
    container_name: db
    command: --transaction-isolation=READ-COMMITTED --binlog-format=ROW
    restart: always
    volumes:
      - /PATH/LOCAL/STORAGE/nextcloud/db:/var/lib/mysql
    environment:
      - MYSQL_ROOT_PASSWORD=A_STRONG_PASSWORD
      - MYSQL_PASSWORD=ANOTHER_STRONG_PASSWORD
      - MYSQL_DATABASE=nextcloud
      - MYSQL_USER=nextcloud

  redis:
    image: redis:alpine
    container_name: redis
    restart: always

  nextcloud:
    image: nextcloud
    container_name: nextcloud
    ports:
      - 8080:80
    environment:
      - MYSQL_PASSWORD=SAME_THAN_MYSQL_PASSWORD_FOR_THE_DB
      - MYSQL_DATABASE=nextcloud
      - MYSQL_USER=nextcloud
      - MYSQL_HOST=db
      - REDIS_HOST=redis
      - NEXTCLOUD_TRUSTED_DOMAINS=nextcloud.your.domain
      - TRUSTED_PROXIES=172.19.0.0/16 # Subnet of your docker network CIDR format
      - OVERWRITEPROTOCOL=https
    volumes:
      - /PATH/LOCAL/STORAGE/nextcloud/www:/var/www/html
    restart: always
    labels:
      - traefik.enable=true
      - traefik.http.routers.nextcloud.rule=Host(`nextcloud.your.domain`)
      - traefik.http.routers.nextcloud.entrypoints=websecure
      - traefik.http.routers.nextcloud.tls.certresolver=myresolver
      - traefik.http.routers.nextcloud.middlewares=nextcloud-headers,nextcloud-dav
      - traefik.http.middlewares.nextcloud-headers.headers.stsSeconds=15552000
      - traefik.http.middlewares.nextcloud-headers.headers.stsIncludeSubdomains=true
      - traefik.http.middlewares.nextcloud-headers.headers.stsPreload=true
      - traefik.http.middlewares.nextcloud-headers.headers.forceSTSHeader=true
      - traefik.http.middlewares.nextcloud-dav.redirectregex.regex=https://(.*)/.well-known/(card|cal)dav
      - traefik.http.middlewares.nextcloud-dav.redirectregex.replacement=https://$$1/remote.php/dav/
      - traefik.http.middlewares.nextcloud-dav.redirectregex.permanent=true
Do a docker compose up -d to start your new deployment.
You can now access your nextcloud server using https://nextcloud.your.domain