Seafile, your own Dropbox / OneDrive
We are going to see how to install and configure Seafile with docker compose
What is Seafile?
Seafile is an open-source, cross-platform file-hosting software system. Files are stored on a central server and can be synchronized with personal computers and mobile devices through apps. Files on the Seafile server can also be accessed directly via the server's web interface. Seafile's functionality is similar to other popular file hosting services such as Dropbox and Google Drive. The primary difference between Seafile and Dropbox/Google Drive is that Seafile is a self-hosted file sharing solution for private cloud applications. In private clouds, storage space and client connection limits are determined exclusively by the users' own infrastructure and settings rather than the terms and conditions of a cloud service provider.
Deployement
In order to install Seafile with docker compose you need to have a working docker environment, you can see how to do it by clicking the link below.
To deploy Seafile, simply use the following docker-compose.yaml file and edit the values:
MYSQL_ROOT_PASSWORDDB_ROOT_PASSWD(same than MYSQL_ROOT_PASSWORD)SEAFILE_ADMIN_EMAILSEAFILE_ADMIN_PASSWORD/path/local/datas/with the real path of a folder you want to use to store Seafile datas and database
---
version: "2.1"
services:
  db:
    image: mariadb:10.6
    container_name: seafile-db
    environment:
      - MYSQL_ROOT_PASSWORD=A-SECRET-PASSWORD
      - MYSQL_LOG_CONSOLE=true
    volumes:
      - /path/local/datas/seafile/db:/var/lib/mysql
    restart: always

  memcached:
    image: memcached:1.6.18
    container_name: memcached
    entrypoint: memcached -m 256
    restart: always

  seafile:
    image: seafileltd/seafile-mc:latest
    container_name: seafile
    ports:
      - 80:80
    volumes:
      - /path/local/datas/seafile/shared:/shared
    environment:
      - DB_HOST=db
      - DB_ROOT_PASSWD=A-SECRET-PASSWORD #Same as above
      - [email protected]
      - SEAFILE_ADMIN_PASSWORD=your-admin-password
      - SEAFILE_SERVER_HOSTNAME=https://seafile.your.domain # If you access your seafile with a domain in https
    depends_on:
      - db
      - memcached
    restart: always
Once your docker compose file saved you can launch your Seafile server with the command:
docker compose up -dConfiguration
Force the Two-Factor Authentication
Before the first login, I higly recommend you to activate and force the Two-Factor Authentication fot all the users.
You can do that by edithing the file /path/local/datas/seafile/shared/seafile/conf/seahub_settings.py and add those 2 lines at the end
ENABLE_TWO_FACTOR_AUTH = True
ENABLE_FORCE_2FA_TO_ALL_USERS = True
Restart Seafile with docker compose restart seafile
First login
After a few seconds you can open a browser and go to http://server-ip and you should be able to access the login page
Log in with the credentials you set with SEAFILE_ADMIN_EMAIL and SEAFILE_ADMIN_PASSWORD on your docker compose file.
After the login, you will be invited to setup the Two-Factor authentication by scanning a QR Code with the application of your choice (Google Authenticator, Bitwarden etc...)
Once logged in, I recommend you to:
- Reset the admin password
- Edit the docker compose file and remove the line
SEAFILE_ADMIN_PASSWORD - Apply the changes with
docker compose up -dAccess Seafile in https and expose it publicly
Currently your Seafile server is only reachable from your home network, to expose it securely to internet you have several choices:
- Reverse proxy, you can see how to deploy a reverse proxy with Swag here
- VPN
Reverse proxy with Swag
I will show you how to do it with Swag, it' s my to go reverse proxy to use with docker containers.
First you need to have a Swag reverse proxy up and running, you can follow my post
Seafile does not have a pre-configured file for swag, so you can use my seafile.subdomain.conf file.
##Seafile reverse proxy configuration for Swag

server {
    listen 443 ssl;
    listen [::]:443 ssl;

    server_name seafile.*;

    include /config/nginx/ssl.conf;

    client_max_body_size 10m;

    location / {
        include /config/nginx/resolver.conf;
        set $upstream_app seafile;
        set $upstream_port 8000;
        set $upstream_proto http;
        proxy_pass $upstream_proto://$upstream_app:$upstream_port;
        proxy_read_timeout 310s;
        proxy_set_header Host $host;
        proxy_set_header Forwarded "for=$remote_addr;proto=$scheme";
        proxy_set_header X-Forwarded-For $proxy_add_x_forwarded_for;
        proxy_set_header X-Forwarded-Proto $scheme;
        proxy_set_header X-Real-IP $remote_addr;
        proxy_set_header Connection "";
        proxy_http_version 1.1;

        client_max_body_size 0;
    }

    location /seafhttp {
        include /config/nginx/resolver.conf;
        rewrite ^/seafhttp(.*)$ $1 break;
        set $upstream_app seafile;
        set $upstream_port 8082;
        set $upstream_proto http;
        proxy_pass $upstream_proto://$upstream_app:$upstream_port;
        proxy_set_header X-Forwarded-For $proxy_add_x_forwarded_for;
        client_max_body_size 0;
        proxy_connect_timeout  36000s;
        proxy_read_timeout  36000s;
        proxy_request_buffering off;
    }

}You can see the reverse proxy use the ports 8000 et 8082, to allow the reverse proxy to access it you need to edit the docker-compose.yaml file and add the 2 ports in the seafile container ports definition.
  *****
  seafile:
    image: image: seafileltd/seafile-mc:latest
    container_name: seafile
    ports:
      - 8000
      - 8082
      - 80:80
 *****
Apply the configuration with
docker compose up -dThen go edit the file gunicorn.conf.py in the folder /path/local/datas/seafile/shared/seafile/conf and modify the line
bind = "127.0.0.1:8000"with
bind = "0.0.0.0:8000"save the file and restart Swag and Seafile with the command:
docker compose restart swag seafileNow, you will be able to access your Seafile server with the url https://seafile.your.domain
You can also remove from the docker-compose.yaml file the line
- 80:80If you don' t want to access your Seafile from the local IP address.
Finalisation
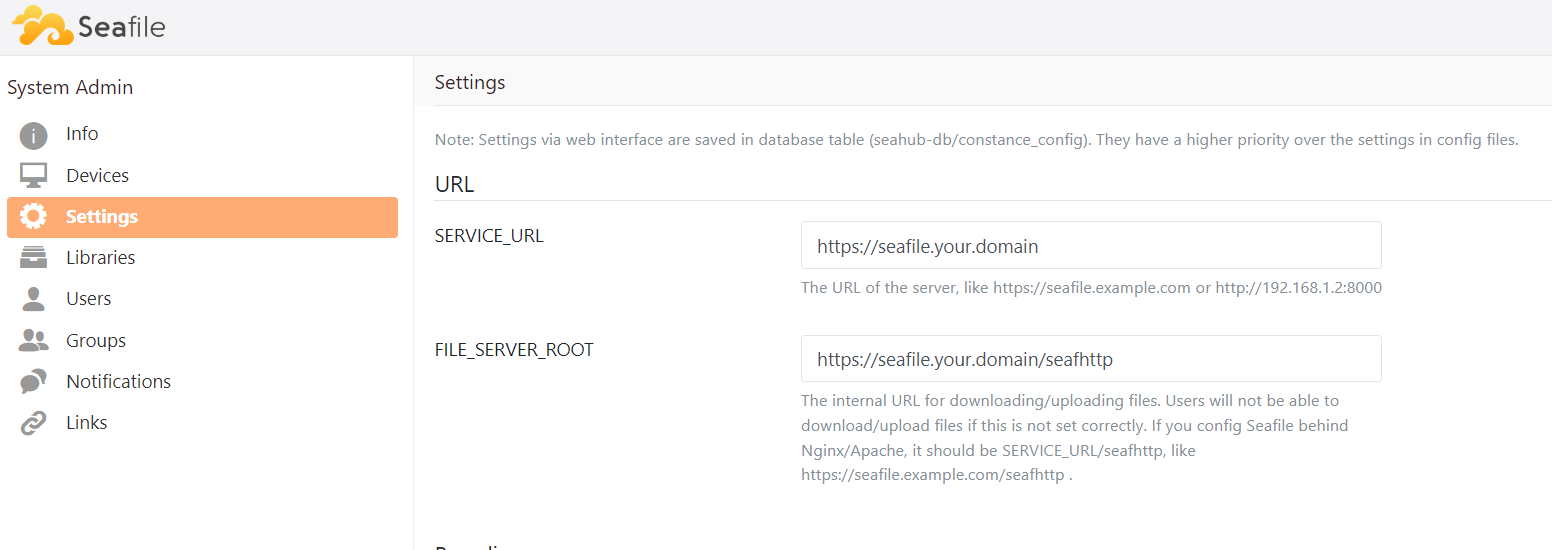
The last thing to do in the Seafile web console is to set the url you use to access Seafile to avoid issues with the avatars:
You can download the desktop et mobile applications by followings this link: https://www.seafile.com/en/download/
sources: